How to Design a Pin
Have you ever wondered how to create a custom enamel pin? Maybe you’ve had an idea bouncing around in your head, or a client has asked about them. If so, you’re in the right place! For this post, I’ll take you through my process when I created my first pin about 4 years ago.

Pins on the Mind
If you’re like me, the best way to develop an idea is with a pencil and paper, which is exactly how I started this process. I had a rough idea in my head and went to town.
Keep in mind, a lapel pin is usually between 1-2 inches. It’s important to simplify your idea as if you’re designing a logo. Personally, I like smaller pins because they’re more wearable, meaning you can place them just about anywhere. So, be sure to plan ahead!

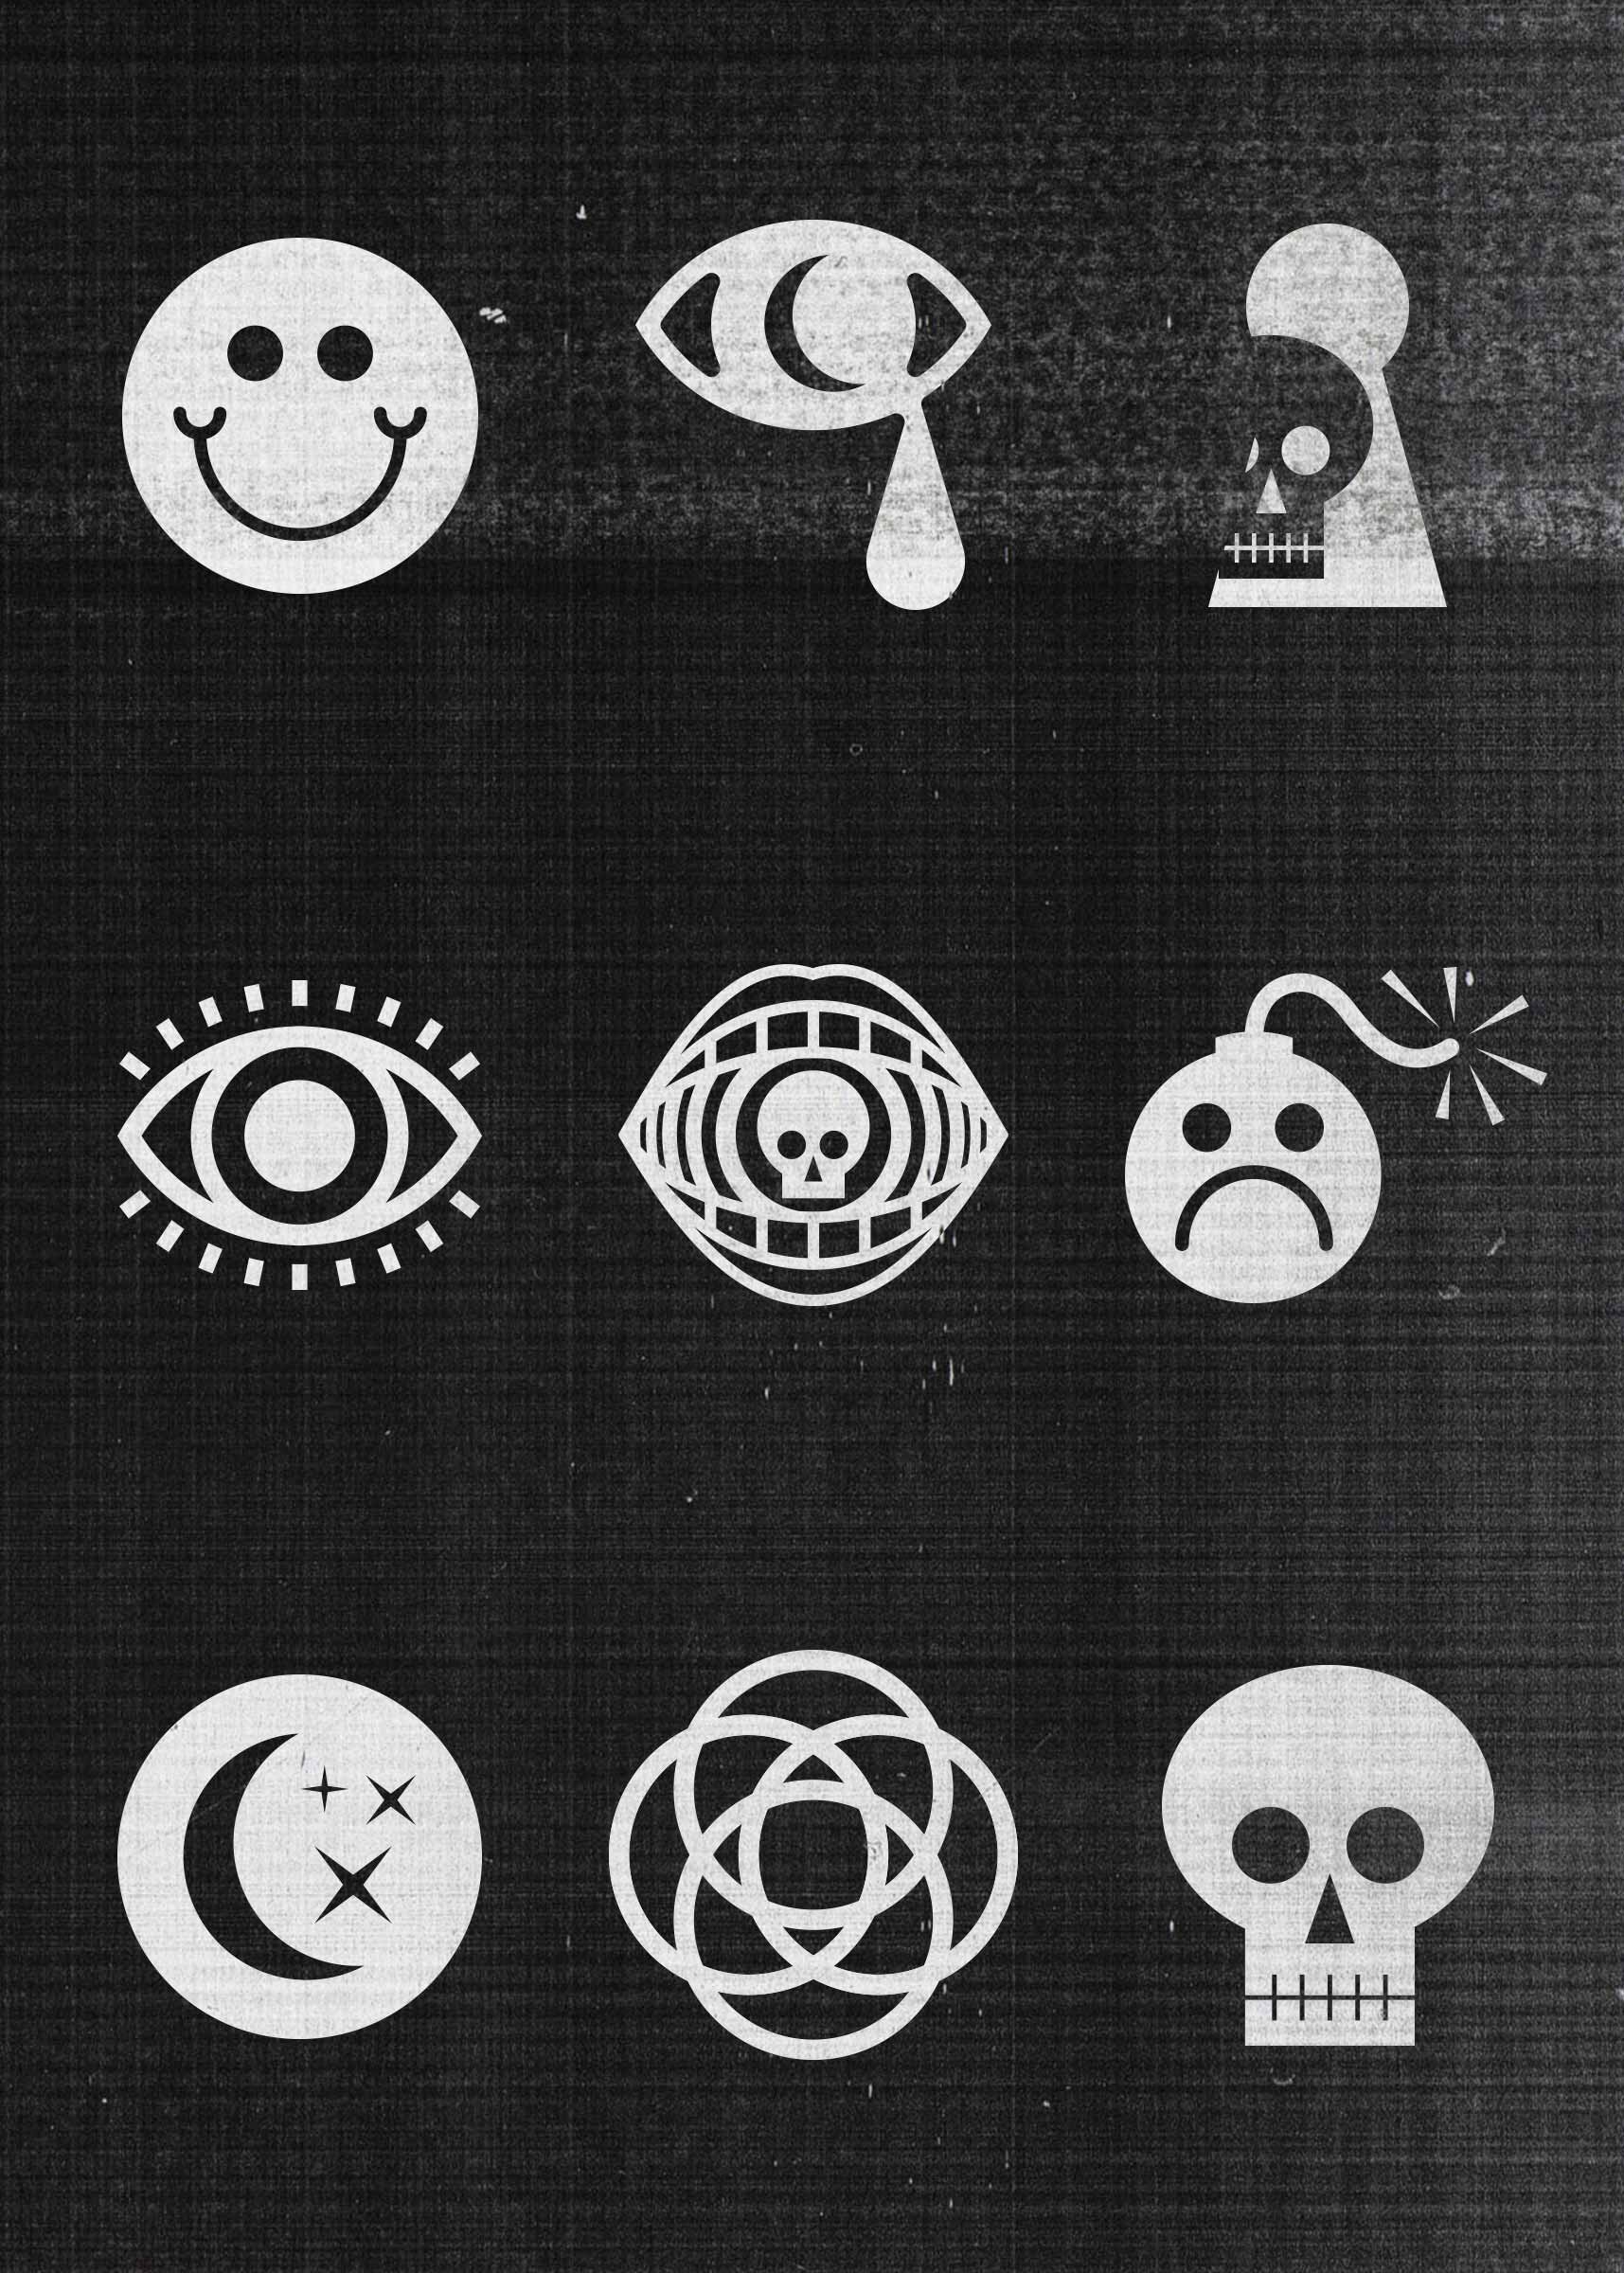
Let’s Get Digital
After I refined my sketches I selected a few that best represented the concept and prepared them for the digital process. You’ll need to recreate your favorites digitally in Illustrator or similar vector based program. If it helps, you can scan your artwork and use it as a guide as you design.
It’s also a good idea to familiarize yourself with the physical production of pin making. In return, this will help your design. For instance, every line you draw will be a metal line on the pin. These lines will be used to create areas to fill-in with color. Speaking of lines, pin vendors also have minimum line weights, so be sure to check and then measure up.
Print and Repeat
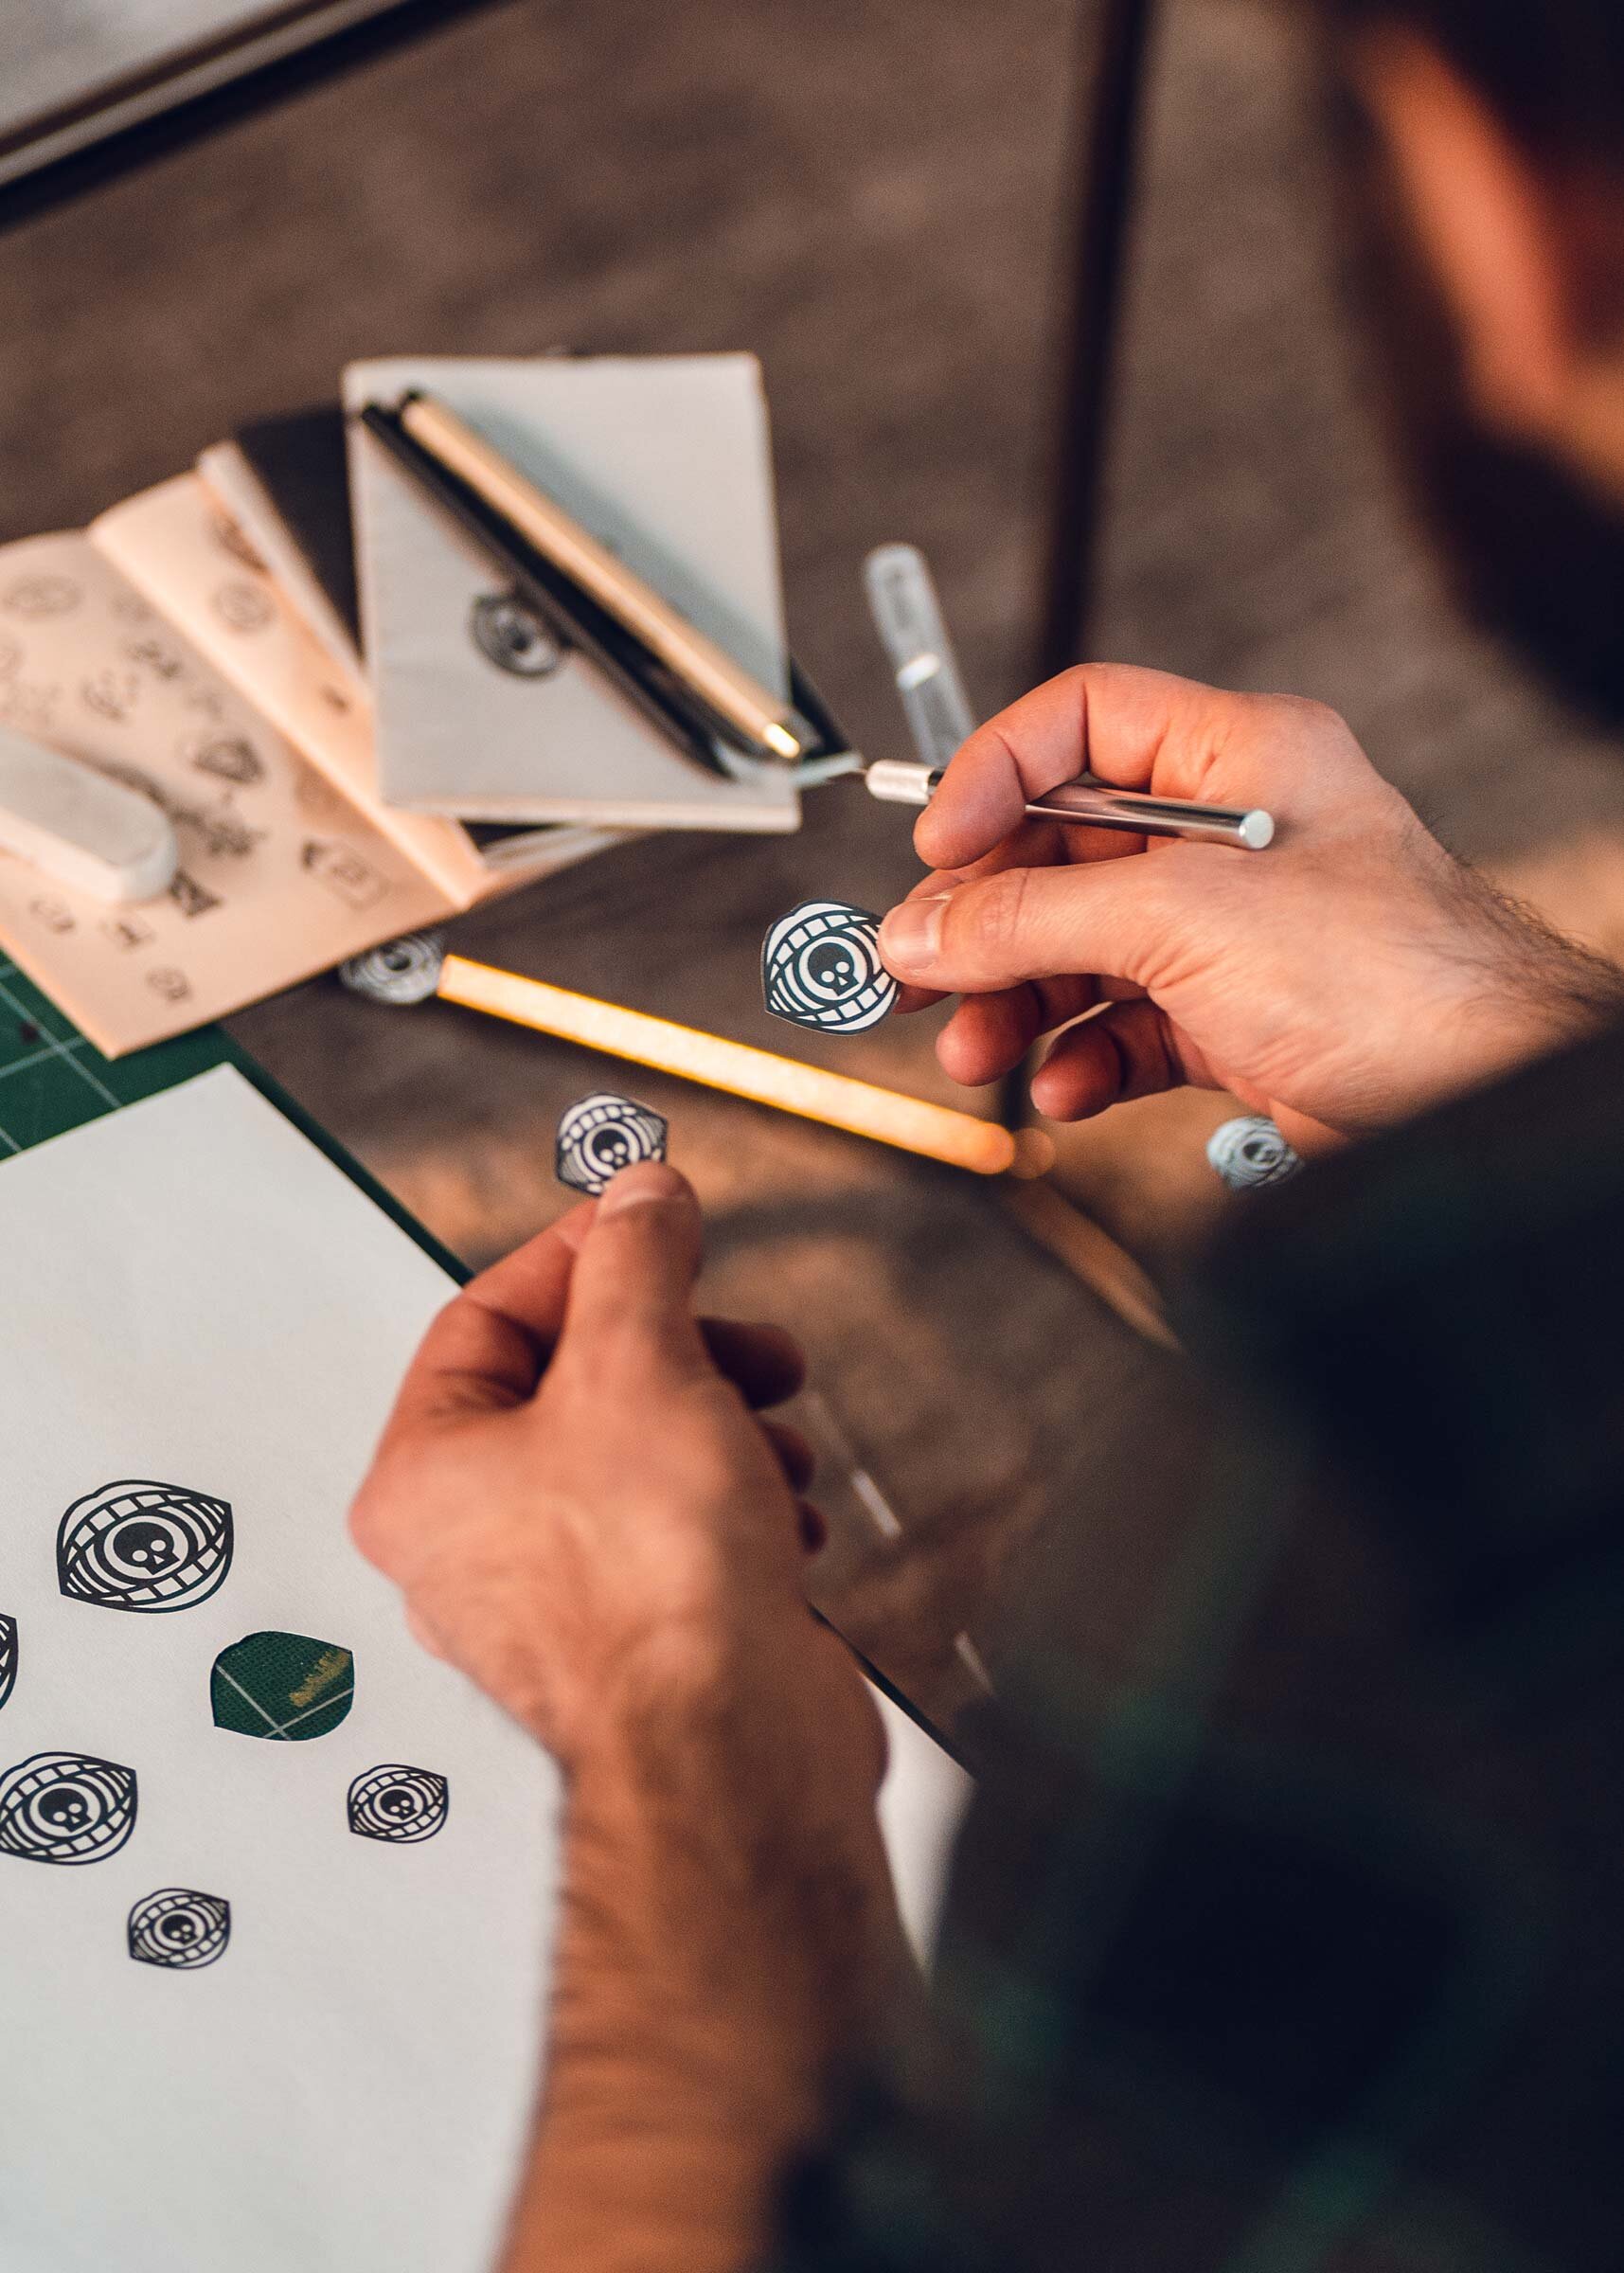
Once I have picked the final design, I’ll repeat it on a separate page in various sizes. From there, I print and cut each one out with a precision knife. This will help to get a sense of how it will look in a physical environment. You can also determine if any details are too small and should be simplified, or perhaps the pin should be larger. If you make any changes, print and repeat until you have that perfect combination.
Final Check
After making final adjustments and speaking with your pin vendor it’s time to hand off your file. This is an important document for both you and the vendor. It should align expectations and act as a guide when your pin goes into production. Make sure it outlines your overall design, shape, size, ink colors and other helpful notes.

When All Is Said and Done
Designing custom enamel pins is a lot of fun! It’s even better when you see someone wearing your creation. If you have any questions along the way or about pins in general, feel free to drop me a line.

