How to Shoot Top Down Photography
For this tutorial I will take you through the process of how I went about taking a top down photo.

Supplies
The first thing I did was gather up all the items to be included in the photo. For this particular session I wanted to capture an image that would show the viewer more about myself and my interests. Things such as my computer that I use to design to my Bell Moto 3 helmet I use to ride motorcycles. Each item helped tell the story of who I am.

Gathering all items needed to style the photo.
Lighting
I wanted this photo to be dark and moody, so the basement seemed like a fitting location because it’s dim with a single window which could act as a natural light source if needed. In addition to the window I worked with an Aputure 120D II LED light with an Aputure Light Dome II. I’ve only used it a handful of times, but it’s proved to be an amazing tool. If you don’t have any lights rethink your location to maximize all natural light sources.

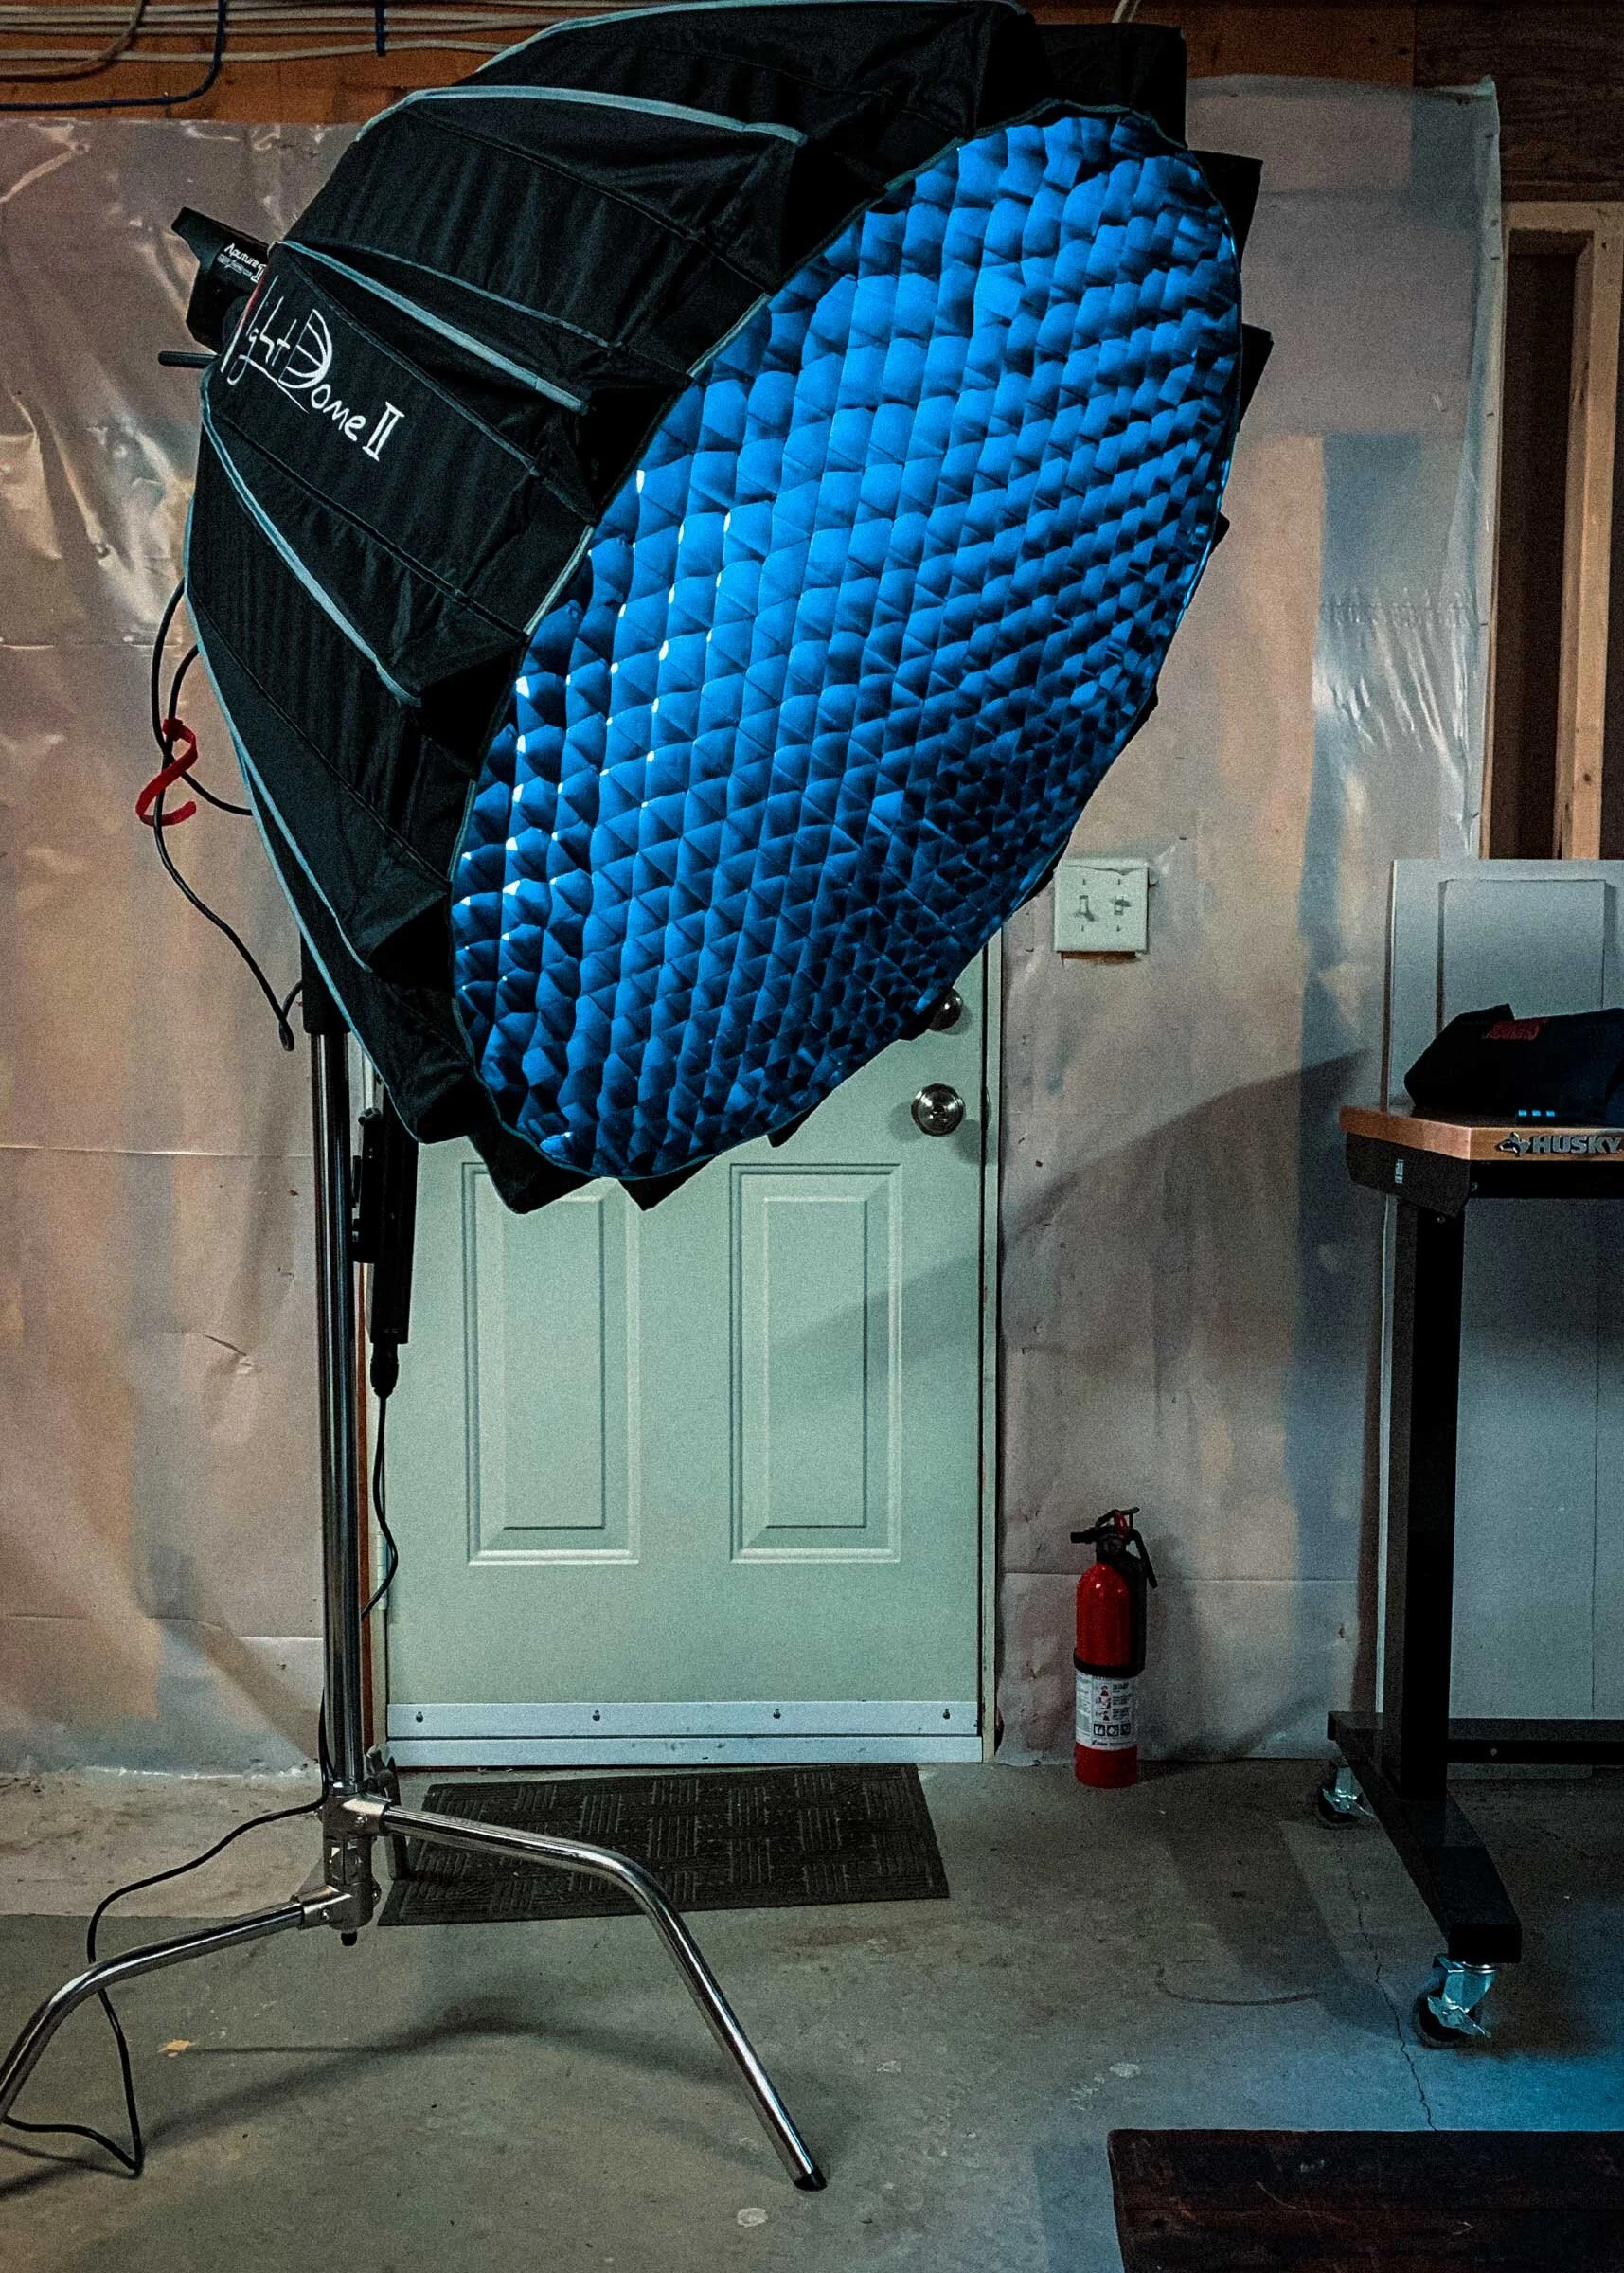
Assembling the Aputure Light Dome II.
The Aputure 120D II setup on a Neewer Pro C-Stand ready to go.
The basement window I used as my natural light source. Although, I ended up blocking most of it with foam boards.
Setup
Since this was a top down shot I needed a surface to act as my ‘background’. I used an old factory door that I picked up years back, which had developed a great patina.
Next, I positioned the LED light on the opposite side of the window to allow for light to hit both sides of my items.
Using a second c-stand and a JOBY ballhead, I mounted and positioned the camera (Sony A7 III) over the surface. I used a Sony Sonnar FE 35mm lens for a wider shot.

The process of the top down photo session.
Layout
I used the foldable screen on the Sony A7 III to help position and frame the items on the surface below. If you don’t have this feature you could use the screen on the back of your camera, an external monitor or wire to a computer. To ensure the photo was straight I matched the grid lines on the LCD screen to the boards of the door while physically leveling the camera as much as possible.

Monitoring the LCD screen on the camera, adjusting the brightness of the LED light and taking a picture using the remote shutter release.
Next I dialed in my camera settings to accommodate for the low light and environment I was working with. I attached a NEEWER Timer Remote to act as a shutter release, because the camera was difficult to reach when mounted on the c-stand over the surface. This also eliminated any shake of the stand if you were to physically press the shutter release on the camera.

NEEWER shutter release remote.
Refine
After a few test shots I adjusted the light, camera settings and reconfigured the layout of each item on the surface. I added a reflector on the floor to bounce some of the light from the LED back onto my subjects. Making numerous adjustments seems tedious, but a necessary part of the process.
To give the composition a final touch of texture I cut off layers of cardboard and scattered them on the surface. A technique I learned from watching Peter Mckinnon.

Adding a reflector to bounce additional light on the subjects.

Cutting up cardboard for a final touch of texture.
Editing
I download the photos, opened up Adobe Lightroom and started editing to further enhance the overall look and feel. Adjusting the levels, curves and colors I was able to achieve the look I intended.
After reviewing the images I realized placing coffee beans near the mug would have acted as a visual cue as to what was inside. However, I had started to clean up so I couldn’t retake the photo. I had to shoot the coffee beans individually on the door surface. Then I used Photoshop to merge them into the final photo. I think it was well worth the added effort.
I hope sharing my process will help you take your own top down photos.
Here’s my final photo!
